Search This Blog

Friday, June 21, 2013

"Waiting" - Acrylic Painting 11" by 14"


Serene, I fold my hands and wait,
Nor care for wind, nor tide, nor sea;
I rave no more 'gainst time or fate,
For lo! my own shall come to me.

I stay my haste, I make delays,
For what avails this eager pace?
I stand amid the eternal ways,
And what is mine shall know my face.
 

 From "Waiting" by John Burroughs 

My hope for this painting was that it would express both the sadness for times that were as well as a quiet optimism for the times that are coming. She is biding her time. But she does not await the future idly. She actively studies to receive it when it does appear. 

I would love feedback. Please do share your thoughts.

Saturday, June 15, 2013

How to Add Texture to Your Acrylic Painting - Grains

Hi there! If the idea of adding grains to your acrylic painting seems strange to you, banish the thought immediately! Some really interesting textures can be produced with different grains, seeds and other dry edibles. I have experimented with sesame seeds, couscous and rice grains. I have also used wheat grains and mung beans. Each of these items has a very interesting form - from spherical orb to flat tear drops and some almost crystalline.

When using food items in your painting, it is very important to seal the painting with high quality acrylic varnish to stop the deterioration due to environmental factors.

For this demo, I have used polenta grains, but you can use any one or combination of grains,seeds etc.,.

Materials:
Canvas,
Paints,
Grains
Brush

Step 1.

Start with a base color. This gives the grains a surface to adhere to. Keep in mind that you will need to use several layers of paint to go on top the grains to glue them well to your canvas. So base coat is a good thing here.  Here I have some glitter paint doodles along with the base coat of paint. I was just playing with the glitter and thought it might be fun.

Do not let this coat dry. That is very important for the grains to adhere to the surface of the paint.


Base coat of paint
Step 2.

On top of the wet layer of paint sprinkle as little or as much of grain,seeds etc.,. as you like.


Polenta- coarse grain
Step 3.

Wait for a few minutes before starting this step. This gives the grains a little bit of time settle into the paint.
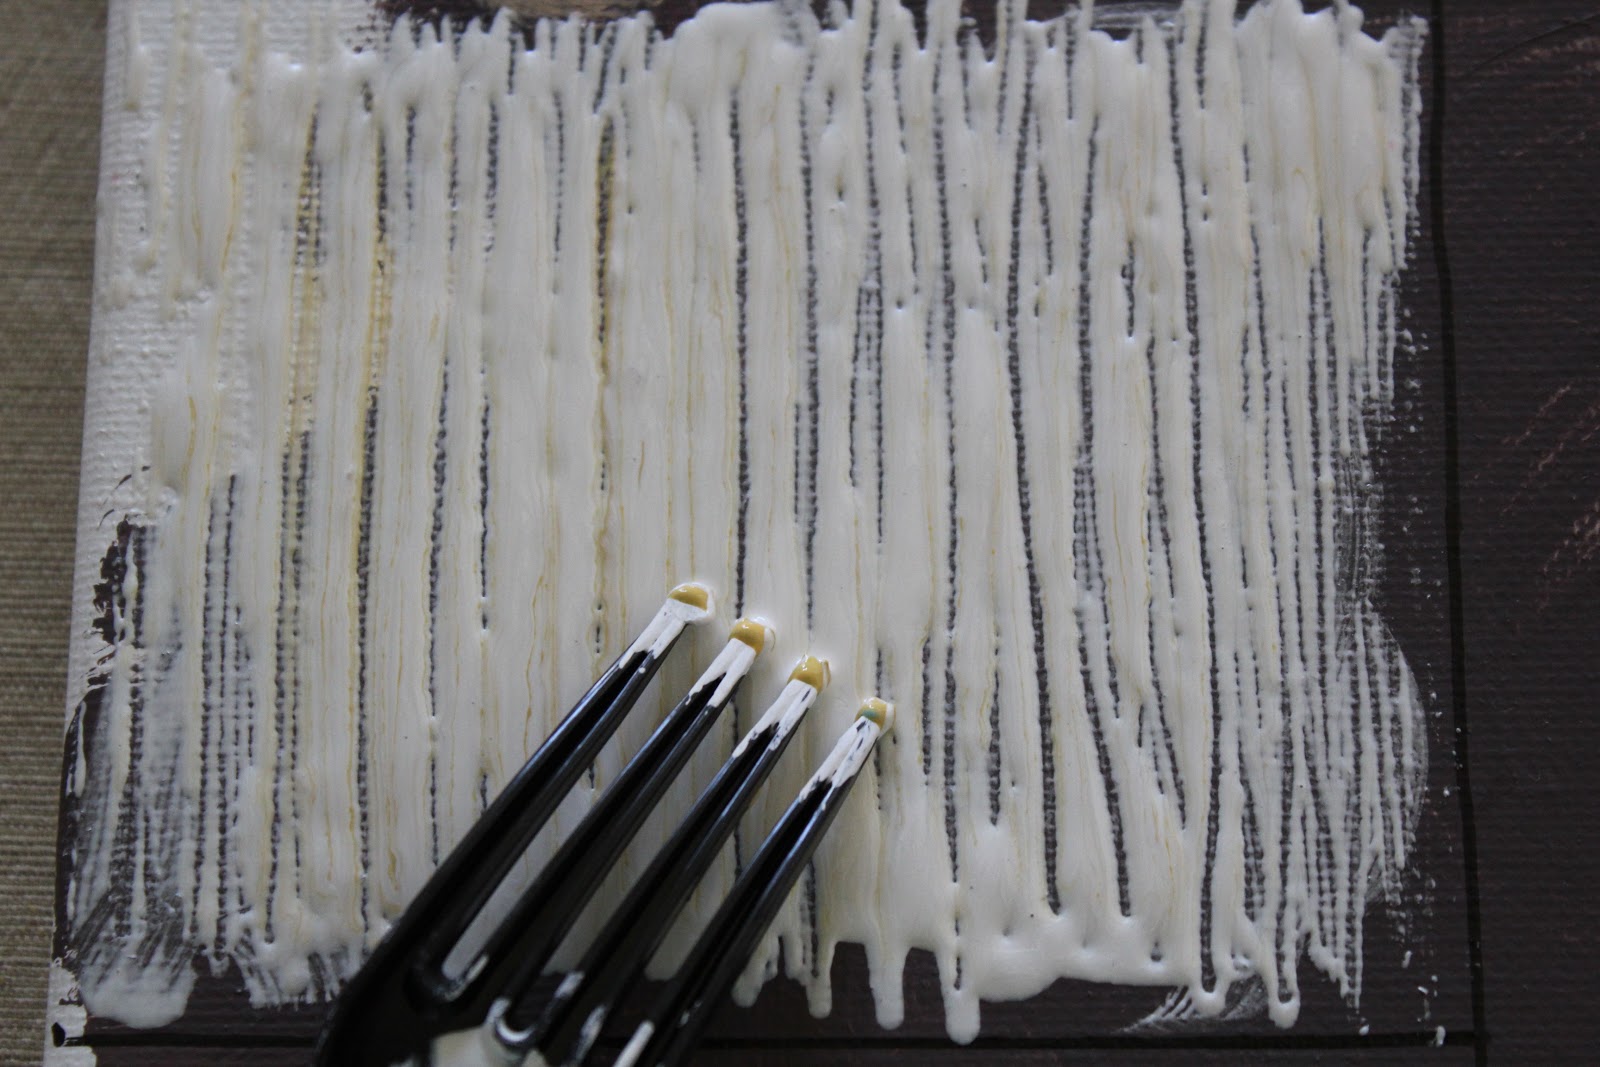
Now comes the fun part. This is your play time. You can get in there with layers of paints and keep going till you have the desired effect and the grains are glued on.


Silver of the glitter paint and couple of layers of brick
red
Step 4.

Admire your handiwork! :-) It is possible that some grain may still shed at this point. But if you have put in enough layers of paint, then this loss should be minimal. I have used this technique for a while now, almost 5-6 years and have found that the quality of the painting does not suffer at all, especially since I make sure to seal it well.

After it dries
The last step would be to apply a good coat of acrylic varnish to seal it all in and keep it from deteriorating.

I would love to hear from you. Please drop in a line or two and let me know how you like these tutorials!


Monday, June 10, 2013

How To Paint Textures on Acrylic Painting - Salt

Here we are, playing with all kinds of materials to add texture to acrylic paints. Usually, it is said that acrylics are harder to texturize, but by adding various additives one can get some very pleasant visual effects. I have used salt in this next demo to a very nice rough texture on my canvas.

Materials:

Canvas
Paints
Salt
Brushes or
Palette knife

Step 1.

I have used a few different colored paints for my experiment, but one should suffice too. Apply a dollop of paint on your canvas. And then pour a good measure of salt on it. Depending on the size of the grain of salt, the texture would be different. Also the thickness of paint would determine the look you achieve. A thin wash of paint with salt on it would be very different , visually from a thicker one. Again, this is open to a lot of different discoveries.


Salt on paint
Step 2.

Spread the whole mixture with a palette knife. 


Step 3.

Let it dry. Already you can see some dry spots on the surface.

Salted Texture


Wednesday, June 5, 2013

How To Add Texture To Your Acrylic Painting - Layers of Paper, Fabric or Found Objects

Welcome back to the tutorial where we explore various ways of adding texture to acrylic painting. 
I love adding depth to my paintings through creating layers atop my canvas painting. I have used mix of heavy and light weight papers-printed or otherwise, with a fair amount of success. Depending on the materials used, there is such a great array of lines and patterns formed, that render interesting texture to the painting. I have used newsprint and fabric as well. Sometimes I have added large glitter, sequins and beads. You can choose just one medium for layering or mix it up. It depends on the composition you have in mind.

In this tutorial, I have used kite paper and some sketch book paper. I keep a pile of paper for layering purposes. This particular sketch paper was a drawing my child had made with markers and didn't want. Usually, I inherit such discards and I welcome them heartily. 

 Materials:

Canvas
Papers, fabric and other items to glue on to the canvas
Tacky glue or hot glue

1. Tear the heavy weight papers and soak them in water for a few minutes to soften them. This makes it easy to stick them on to the canvas. Tear the light weight kite paper and keep aside. 

Soaking the heavy weight paper in water

 Step 2.

Apply a thin layer of tacky glue on the canvas. I had to mix a little water with the tacky glue to help spread it easily.

 Glue on the canvas

Step 3.

Working quickly, stick the pieces of paper on the canvas. I wanted an evenly spread mix of thick and thin layers. 
  
Glued the papers on to the canvas
Step 4.

After the layers of paper dry, you can go over the surface with a coat of paint. 


Mint Julep Green on top of the layers of paper

Layers with paper next to layers with paint

Monday, June 3, 2013

How to add Texture to your Acrylic Painting - Linen Look

Howdy Ya'll!As promised in the last post, I am here with my Canvas With Possibilities to show you how to achieve the linen look on your canvas using acrylic paints and some easy to find tools around your home. I try to use what I have rather than running down to the hardware store for supplies. Just the frugal girl in me.

So here's what we are going for.

Materials:

-Canvas,
-Two or more colors, depending on how much of a contrast you would like. Since I already have a brown paint layer on the canvas, I am going to use a lovely cream for a contrast.
-Fork, comb, toothpicks, anything that can be used to draw lines through wet paint.


See how the background color shows through
 
Step 1.

Start with applying a base coat of paint. I have brown underneath, but you could could use any color.
Once that dries, drop a generous dollop of contrasting paint over it.


Step 2.

Next gently spread the paint with a brush.


Step 3.

Use your fork or comb or toothpick to pull lines through the still wet paint. You could wait a few minutes to get in there as well. That way, the texture is even more pronounced. You have to try different wait times and see what happens to decide what effect you like best. At this point, you can even dip your combing tool in another color and comb over the paint.  I have used a little yellow ochre on my fork. This adds another dimension to your texture. Play with it!


So this is one way of achieving a linen look on your painting. I hope you found this tutorial helpful. Please share pictures of your explorations and tell me what you discover in the process. I would love to hear from you.